The equipment we use to shoot Mama Natural videos
We frequently get asked what camera, lights, microphones, etc. we use to shoot Mama Natural videos, so here’s a complete list of our video equipment.
Are you a complete beginner? Scroll down to the bottom of this page for our equipment recommendations.
Disclaimer
Michael, aka Papa Natural, is pretty geeky when it comes to equipment. If you’re just getting started, you don’t need our full kit.
And keep in mind that some of our most popular videos, like my birth video that’s been seen almost three million times, were shot on a Canon PowerShot like this one.
The Video Cameras We Use
Where we’ve been
All of our early videos were shot on a Panasonic handycam like this one. The key to this cam was that it had an external microphone jack, which is essential for decent audio.
After we reached a million views on YouTube, we celebrated by buying a Canon 60D. DSLRs like this one elevate video quality way beyond what a handycam can do. Over time, we got a few nice lenses for it, but the kit lens was fine for getting started.
When it came out, we added the Canon 70D to our kit. This camera is sharper than the 60D and adds a touchscreen and auto focus during video shooting. Very nice camera.
Where we are now
In September 2014, Papa Natural was swept up in the 4K video fever (double the resolution of HD), and we sold the Canon 60D and 70D in favor of the Panasonic GH4. We are loving this camera so far.
We also use this less expensive Panasonic micro four thirds camera as our “B-camera,” along with the Canon PowerShot. Note that neither of these camera have external audio jacks, which make them unsuitable for a primary camera.
The Microphones We Use
Audio is more important than video. As viewers, we can forgive a bad picture. But we can’t ignore bad audio.
For years, we used this Audio-Technica lavalier microphone. It’s wired, meaning you need to run a cable from your speaker to your camera, but the cable is 20 feet long, so it works even when your subject is very far away. It’s a great mic for the money, and will improve your audio sound a thousands times over when compared to your camera’s built in microphone.
After we wore out two of those Audio-Technica mics, we upgraded to one of these pricey wireless lavalier mics by Sennheiser. It’s pretty awesome to get rid of the cables, and the sound is great. But it’ll cost ya.
For multi-person shots, we have a Rode VideoMic Pro, which is compact and delivers way better audio than our camera’s built in mic.
Finally, we have a Rode SmartLav, which is pretty handy. It’s a lavalier mic that plugs into your smartphone, and then you sync the audio to your video in your editing software. It’s great for when you need to shoot something with a smartphone or one of your b-cameras that don’t have microphone jacks.
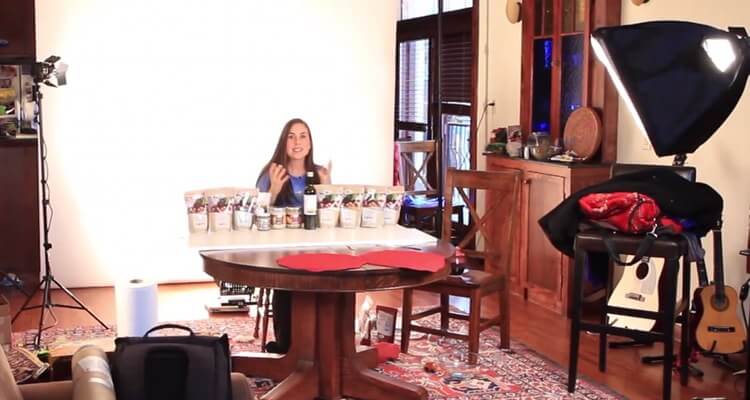
The Lights We Use
Lights can make your subjects pop and look far better than they will under regular lighting conditions. Daylight or overhead lights can throw weird shadows over people’s faces, giving them “raccoon eyes.” Studio lights lift those shadows off your subject and light their faces more evenly. Also, lights give a shine to the eyes, which helps people look more vibrant and alive on video.
three-point-lighting-diagram
Once Griffin came around, we found we had to shoot at night after he’d gone to sleep, so we bought this umbrella lighting kit from Cowboy Studios. We added a couple of these mongo 105 Watt fluorescent bulbs, also from Cowboy Studios.
An advantage to these bulbs is that they run cool, so your subject won’t sweat under the lights in summertime. Also, the kit folds up really small.
A disadvantage to the lights is that they’re huge CFL bulbs, filled with mercury. So handling them was always a little nerve wracking, and Genevieve was never comfortable having them around.
The three lights in the kit mentioned above allowed us to do “three point lighting,” which is demonstrated in the diagram above. Google “three point lighting” for specific tips on how to set it up.
As part of the YouTube NextUp program, we received this Wescott Illusions lighting kit, which is what we use now. It uses 500W incandescent bulbs that burn hot, but the light is golden and very flattering.
Editing Software We Use
Papa Natural has used both Adobe Premiere and Final Cut Pro in the past, and he prefers Final Cut Pro X now. It’s easy to use, accepts all sorts of video files natively (meaning you don’t need to convert them in order to edit them), and integrates with all the other Mac software.
iMovie would probably be fine for most beginners, as would Windows Movie Maker. Premiere and FCPX can have a bit of a learning curve, which may be discouraging at first. The important thing is to just edit your video together quickly and get it up on YouTube.
The Video Kit We Recommend for Budget-Conscious Beginners
If you’re just getting started with video for your blog or YouTube channel, and you want “prosumer” video quality, and have a bit of a budget, we’d recommend this kit.
The total for this kit is $728, and you’ll get top notch video out of it. Not bad.
Really strapped on cash?
If you can only spend half of that, consider this setup.
Shoot in natural light and you’re all set for decent audio and video at a very low cost.
Good luck and we will see you on YouTube!